0

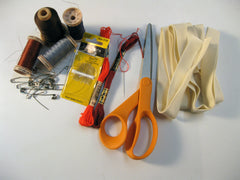 |
You'll only need some basic quilting tools: scissors, safety pins, straight edge, an iron, and a sewing machine.* Select high quality materials that are 100% natural. We prefer YLI quilting thread, DMC embroidery thread, Quilter's Dream Batting, and Robert Kaufman or P&S Fabrics. |
Materials shopping list: 1 yd cotton fabric (quilt top) 1 yd cotton fabric (quilt bottom) 1 yd cotton batting 5 yds bias tape hand-sewing needles, quilting thread, embroidery thread, basting pins |
 |
Start by ironing out your materials and keep them flat as possible. Smooth your quilt layers, working from the center towards the edges. |  |
 |
 |
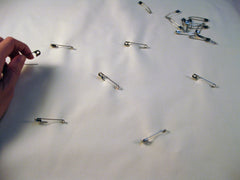
Baste your quilt by spacing safety pins equally through all three quilt layers. |
 |
Once the quilt sandwich is assembled and properly basted, loosely pin the map template to the top layer of fabric. Start quilting from the center, and trace the map with a simple running stitch through the template. Make sure your stitches are taut! |  |
 |
Keep one hand above your quilt project (weaker hand) and one hand below (dominant hand) while stitching. You'll sew much faster. Keep your thread length under 18" or so to avoid snags. Tie off your ends on the back side of your quilt project by knotting them. |  |
| You can machine-stitch your quilt project if you prefer! |  |
Alternate your thread colors, thread thickness and stitch lengths to create different map elements. Each map template has a legend of recommendations. |
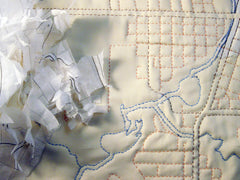
| The map template is single-use. When you're done stitching, carefully tear away the material to reveal the finished quilt. |  |
 |
 |
If some of your stitches become loose after the template is torn away, gently pull them from the back of the quilt or massage the quilt layers to even out puckers. | QUILT BINDING: there are many different of methods of binding quilt edges. Use whatever method works best for you. Red Pepper Quilts has a great binding tutorial, or search youtube for ideas. We'll post a video for our mitered corner technique soon. |
| Square up your quilt edges. You'll probably lose some map elements near the edges, but that's ok. Air-erase marking pens are really helpful. Sew a simple frame border around your quilt with a sewing machine. |  |
 |
 |
 |
Easiest binding technique: Trim your quilt border and apply your quilt binding edge with the sewing machine. You can make your own binding strips, or purchase bias-cut strips that are pre-made. Fold the edges at the corner and sew down. |
| Add details to personalize your quilt using embroidery stitching. Use a removable marking tool to sketch out details to embroider. Rocksea.org is a great resource for stitch techniques. | 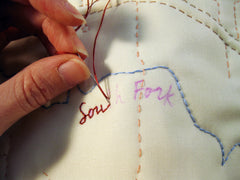 |
 |
@hapticlab for the fun stuff